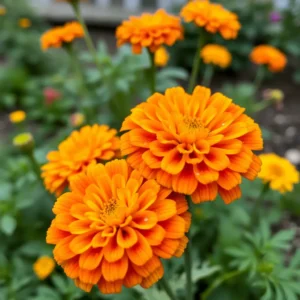
Marigolds are among the most beloved flowers in gardens worldwide, prized not only for their vibrant colors but also for their remarkable ability to repel pests naturally. These cheerful blooms can transform any garden space with their bright orange, yellow, and red hues, creating a stunning display that lasts from spring until the first frost. Yet despite their reputation as low-maintenance plants, many gardeners struggle to achieve the abundant, healthy blooms that make marigolds so desirable.
This comprehensive guide will walk you through everything you need to know about marigold flower plant care, from selecting the right variety to troubleshooting common problems. Whether you’re a beginner looking to add these versatile flowers to your garden for the first time or an experienced gardener wanting to maximize your marigold’s potential, you’ll discover proven techniques for growing marigolds that will thrive throughout the growing season.

Understanding Marigolds
What Are Marigolds?
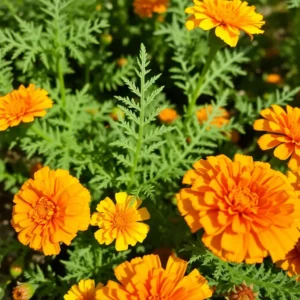
Marigolds (Tagetes) are annual flowering plants native to Mexico and Central America, though they’ve been cultivated worldwide for centuries. These sun-loving plants are characterized by their distinctive pinnate green foliage and densely double flower heads in warm colors ranging from pale yellow to deep orange, gold, and rusty red. Beyond their ornamental appeal, marigolds have been used historically in many cultures for medicinal, ceremonial, and culinary purposes.
Types of Marigolds
When planning your marigold planting, it’s important to understand the different types available:
French Marigolds (Tagetes patula)
French marigolds are compact plants typically growing 6-12 inches tall with a neat, mounded habit. Their flowers are smaller but more numerous than other varieties, featuring intricate patterns of mahogany, orange, yellow, and bicolor combinations.
Ideal uses: Perfect for borders, edging, containers, and mass plantings. Their smaller size makes them excellent for window boxes and smaller gardens.
Specific care tips: French marigolds are more shade-tolerant than other varieties, though they still perform best with at least 4-6 hours of direct sunlight daily. They’re particularly effective as companion plants for vegetables due to their pest-repelling properties.
African Marigolds (Tagetes erecta)
Despite their name, African marigolds also originated in Mexico. These imposing plants can reach 3-4 feet tall, producing large, fully double blooms that resemble carnations or peonies, primarily in yellow and orange shades.
Ideal uses: These statement plants work wonderfully as backdrop plantings, cutting gardens, and focal points. Their height makes them perfect for the middle or back of flower beds.
Specific care tips: African marigolds require full sun exposure and good air circulation to prevent disease. They may need staking in windy locations due to their height and large flower heads. Their longer growing season means they benefit from starting indoors 6-8 weeks before the last frost.

Signet Marigolds (Tagetes tenuifolia)
Signet marigolds feature finely divided, lacy foliage and masses of small, single flowers. Growing 8-12 inches tall with a spreading habit, they have a subtle citrus scent and more delicate appearance than their cousins.
Ideal uses: Ground covers, rock gardens, hanging baskets, and edible garden borders. Their edible flowers make attractive garnishes for salads and desserts.
Specific care tips: Signet marigolds are more drought-tolerant than other varieties. They benefit from occasional trimming to maintain their shape and continuous blooming. Their foliage is particularly aromatic when brushed against.
Why Choose Marigolds?
Marigolds offer numerous benefits that make them a smart choice for any garden:
- Natural pest control: Their strong scent repels nematodes, aphids, mosquitoes, and other problematic garden pests
- Easy growing: Even first-time gardeners can achieve success with marigold flower plants
- Extended blooming season: With proper care, marigolds flower continuously from late spring until frost
- Versatile uses: They work in gardens, containers, as companion plants, and even as cut flowers
- Pollinator attraction: Marigolds bring beneficial bees and butterflies to your garden
- Drought tolerance: Once established, marigolds require relatively little water
Planting Marigolds
From Seeds
Growing marigolds from seeds is economical and rewarding. Here’s how to ensure success:
When to Start Seeds Indoors
For an early display of blooms, start marigold seeds indoors 6-8 weeks before your region’s last expected frost date:
- Northern regions (Zones 3-5): Start seeds in early to mid-March
- Middle regions (Zones 6-7): Start in late February to early March
- Southern regions (Zones 8-10): Start in early February or direct sow outdoors after danger of frost
How to Start Seeds
- Prepare containers: Use seed-starting trays with drainage holes filled with a sterile seed-starting mix
- Plant seeds: Sow marigold seeds ¼ inch deep, spacing them about 1 inch apart
- Provide light: Place in a warm location with bright, indirect light or under grow lights
- Maintain moisture: Keep soil consistently moist but not soggy, using a spray bottle for gentle watering
- Harden off seedlings: About a week before transplanting, gradually expose seedlings to outdoor conditions
- Transplant: Move to garden beds or containers after all danger of frost has passed and soil has warmed
From Seedlings/Transplants
If you’re starting with nursery-grown seedlings, follow these guidelines:
When to Plant Outdoors
Time your marigold planting based on your local climate:
- Wait until soil temperatures reach at least 65°F
- After the last frost date for your region
- When nighttime temperatures consistently stay above 50°F
Choosing Healthy Seedlings
Look for:
- Compact, bushy growth with multiple stems
- Bright green foliage without yellowing or spots
- No signs of pests or disease
- Buds present but few or no open flowers (plants with many open blooms have likely been in containers too long)
Preparing the Soil
Marigolds aren’t particularly fussy about soil, but they’ll thrive with proper preparation:
- Clear the planting area of weeds and debris
- Loosen soil to a depth of 8-10 inches
- Incorporate 2-3 inches of compost or well-rotted manure
- For heavy clay soils, add additional organic matter and sand to improve drainage
- For sandy soils, add extra compost to improve water retention
Planting Instructions
- Dig holes slightly larger than the root ball of your seedlings
- Space French and Signet marigolds 8-10 inches apart
- Space African marigolds 10-18 inches apart, depending on variety
- Plant at the same depth as they were in their original containers.
- Firm soil gently around roots and water thoroughly

Growing Marigolds in Pots
Container growing is perfect for patios, balconies, or positioning marigolds precisely where their pest-repelling benefits are most needed.
Best Pot Size and Material
- Choose containers at least 8-12 inches deep and wide for French and Signet marigolds
- Use 12-14 inch containers for African marigolds
- Terra cotta pots provide good breathability but dry out faster
- Plastic containers retain moisture longer, requiring less frequent watering
- Ensure all containers have adequate drainage holes
Potting Mix Recommendations
Create an ideal growing medium by using:
- High-quality potting mix (not garden soil)
- Equal parts potting soil, perlite, and compost
- Or commercial potting soil formulated for flowering plants
Watering and Drainage Considerations
- Container marigolds require more frequent watering than garden-planted ones
- Check moisture levels daily during hot weather
- Let the top inch of soil dry out slightly between waterings.
- Place a layer of gravel in container bottoms to improve drainage
- Consider self-watering containers for consistent moisture
Marigold Care
Sunlight
Proper light exposure is crucial for abundant marigold blooms:
Ideal Sunlight Requirements
- Full sun (6+ hours of direct sunlight daily) is ideal for most marigolds
- French marigolds can tolerate partial shade (4-6 hours of sun)
- Morning sun with afternoon shade works well in extremely hot climates
Impact of Sunlight on Bloom Quality
Insufficient sunlight leads to:
- Leggy, stretched growth
- Fewer flowers
- Weaker stems
- Increased susceptibility to disease
Watering
Proper hydration balances marigolds’ drought tolerance with their moisture needs:
Watering Frequency and Techniques
- Established plants: Water deeply once weekly in average conditions
- New transplants: Water every 2-3 days until established
- Watering method: Direct water at soil level to keep foliage dry
Avoiding Overwatering and Underwatering
Watch for these signs:
- Overwatering: Yellowing lower leaves, soft stems, fungal diseases
- Underwatering: Wilting, flower drop, crispy leaf edges
Climate-Based Watering Adjustments
- Hot, dry climates: Increase watering frequency to twice weekly
- Humid climates: Reduce frequency but maintain deeper watering
- Rainy periods: Hold off watering until top inch of soil feels dry
Soil
While adaptable, marigolds perform best with specific soil conditions:
Ideal Soil Type and pH
- Well-draining, moderately fertile soil
- Slightly acidic to neutral pH (6.0-7.0)
- Loamy texture preferred over heavy clay
Soil Amendments
Improve native soil with:
- Aged compost (2-3 inches worked into planting area)
- Well-decomposed manure
- Leaf mold or worm castings
Improving Drainage
For heavy soils or areas with poor drainage:
- Create raised beds
- Incorporate coarse sand
- Add organic matter to improve soil structure
Fertilizing
Marigolds don’t require heavy feeding, but proper nutrition enhances blooming:
Best Fertilizer Types
- Balanced fertilizer (10-10-10) at planting time
- Switch to bloom-boosting formula (5-10-10) once plants are established
Fertilizing Schedule
- At planting: Mix slow-release fertilizer into soil
- Mid-season: Apply liquid fertilizer monthly
- Late season: Reduce or eliminate feeding to prevent leggy growth
Organic Fertilizer Options
- Compost tea applied every 2-3 weeks
- Fish emulsion (diluted according to package directions)
- Bone meal to encourage blooming
Deadheading
Regular deadheading is essential for continuous marigold blooms:
Why Deadheading Is Important
- Prevents seed formation, redirecting energy to new blooms
- Reduces disease risk by removing decaying material
- Maintains neat appearance and encourages bushier growth
How to Deadhead Marigolds Properly
- Identify spent flowers (petals faded or browning, center becoming dry)
- Using clean scissors or fingernails, pinch off the flower head just above the first set of leaves
- Remove entire stem if it has multiple spent blooms
- Deadhead twice weekly during peak growing season
Common Problems and Solutions
Pests
Despite their pest-repelling reputation, marigolds occasionally face insect challenges:
Aphids
Identification: Tiny green, black, or white insects clustered on stems and leaf undersides
Prevention:
- Strong water spray to dislodge colonies
- Maintain good air circulation between plants
- Attract beneficial insects with companion plantings
Treatment:
- Organic: Insecticidal soap spray, neem oil solution
- Chemical (if necessary): Pyrethrin-based insecticides
Spider Mites
Identification: Fine webbing on undersides of leaves, stippled yellowing foliage
Prevention:
- Regular misting to increase humidity
- Avoid water stress
- Maintain clean garden area
Treatment:
- Organic: Horticultural oil, insecticidal soap
- Chemical (if necessary): Miticides specifically labeled for ornamentals
Other Pests (Slugs, Snails, etc.)
Identification: Ragged holes in leaves, slime trails
Prevention:
- Copper tape barriers around plants
- Eliminate hiding places like boards and excess mulch
Treatment:
- Organic: Diatomaceous earth sprinkled around plants, beer traps
- Chemical (if necessary): Iron phosphate-based slug baits
Companion Planting for Pest Control
Pair marigolds with:
- Tomatoes (marigolds repel tomato hornworms)
- Cucumbers (marigolds deter cucumber beetles)
- Roses (marigolds repel aphids and nematodes)
- Basil (mutual pest-repelling benefits)
Diseases
Several fungal and bacterial issues can affect marigold health:
Powdery Mildew
Identification: White powdery coating on leaves and stems
Prevention:
- Space plants properly for air circulation
- Water at soil level only
- Choose resistant varieties
Treatment:
- Organic: Baking soda spray (1 tbsp baking soda, 1 tsp mild soap, 1 gallon water)
- Chemical (if necessary): Fungicides containing sulfur or copper
Root Rot
Identification: Wilting despite adequate moisture, blackened roots, stem base discoloration
Prevention:
- Ensure excellent drainage
- Avoid overwatering
- Plant in raised beds in heavy soil areas
Treatment:
- Organic: Remove affected plants, improve drainage for remaining plants
- Chemical (if necessary): Soil fungicides containing fosetyl-aluminum
Other Diseases
Botrytis Blight:
- Identification: Gray fuzzy mold on flowers and buds
- Prevention: Remove spent blooms promptly, ensure good air circulation
- Treatment: Remove affected parts, apply copper-based fungicide in severe cases
Aster Yellows:
- Identification: Stunted growth, yellow leaves, deformed flowers
- Prevention: Control leafhoppers (the insect vector)
- Treatment: Remove and destroy affected plants (no cure available)
Other Issues
Leggy Growth
Causes:
- Insufficient light
- Excessive nitrogen fertilizer
- Overcrowding
Solutions:
- Relocate to sunnier location
- Switch to lower-nitrogen, higher-phosphorus fertilizer
- Prune back by one-third to encourage branching
- Maintain proper spacing between plants
Lack of Blooms
Causes:
- Too much shade
- Excessive nitrogen
- Improper watering
- Overfertilization
Solutions:
- Ensure 6+ hours of direct sunlight
- Reduce nitrogen fertilizer
- Establish consistent watering schedule
- Apply bloom-boosting fertilizer with higher phosphorus content
Yellowing Leaves
Causes:
- Overwatering
- Nutrient deficiencies
- Natural aging of lower leaves
Solutions:
- Reduce watering frequency
- Apply balanced fertilizer
- Remove only severely yellowed leaves
Extending the Blooming Season
Marigolds can provide continuous color from late spring through fall with these techniques:
Deadheading Techniques
- Implement a regular deadheading schedule at least twice weekly
- For African marigolds, remove the entire flower stalk down to a main branch junction
- For French and Signet marigolds, pinch just above a leaf node
- Consider “cutting back” by trimming plants by one-third mid-season to rejuvenate them
Successive Planting
- Stagger marigold planting every 2-3 weeks from spring through early summer
- Replace spring-planted marigolds that look tired with fresh seedlings in mid-summer
- Maintain a separate “nursery” area or containers with young marigolds ready for transplanting
Providing Adequate Sunlight and Nutrients
- Reposition containers if necessary to follow the sun as seasonal light patterns change
- Apply half-strength bloom-boosting fertilizer every 3-4 weeks during extended growing season
- Mulch around plants to maintain consistent soil moisture and temperature
Harvesting Marigold Seeds
Collecting your own marigold seeds is easy and economical:
- Select seed heads: Choose fully mature, dry flower heads from healthy plants
- Harvest timing: Wait until flower petals have completely dried and turned brown
- Collection method: Snip entire seed heads and place in paper bags
- Seed extraction: Once fully dry, gently crush heads between fingers to release seeds
- Storage: Store seeds in paper envelopes in a cool, dry place for up to 3 years
Conclusion
Growing vibrant, healthy marigolds is achievable for gardeners of all skill levels when armed with the right knowledge. These versatile flowers reward minimal effort with months of colorful blooms while providing natural pest protection throughout your garden. From marigold planting to ongoing care, the techniques covered in this guide will help you achieve spectacular results year after year.
Whether you’re growing marigolds for their ornamental value, companion planting benefits, or simply to brighten your outdoor space, implementing these proven care practices will ensure your marigold flower plants reach their full potential. Start with quality seeds or seedlings, provide the right growing conditions, and follow the maintenance tips outlined above for a garden filled with these cheerful blooms.
Have you grown marigolds in your garden? Share your marigold photos and success stories with us in the comments below! We’d love to see how these vibrant flowers are enhancing your outdoor spaces.